
How to use the E. coli testkit
Monitoring purpose
Monitoring bacteria helps communities answer one of the most important questions people ask about their water: can I swim and play in the water here?
Escherichia coli (E. coli) is a type of bacteria found in the intestines and feces of humans and other warm-blooded animals. Because it comes from feces (poo!), it is used as an indicator of contamination in recreational water from sewage and stormwater. Higher levels of E.coli indicate greater contamination and an increased risk of illness. Feces from humans and animals like cattle, are of concern for human health.
What can E. coli tell you about water quality?
Testing indicates potential health risks, but does not identify the source of contamination or which pathogens may be present. It also does not cover other hazards, such as harmful algae or chemical contaminants, so a low result does not mean water is risk-free.
What this kit can and cannot tell you
This kit provides a practical way for community scientists to monitor E. coli and look for patterns over time. Repeated testing can help you understand changes in water quality and identify results that may warrant further investigation.
This is a screening tool, not a replacement for approved laboratory methods or official recreational water monitoring. Results from this kit cannot be used to issue swimming advisories or make official beach-management decisions.
Before you use your equipment, make sure to familiarize yourself with the Water Rangers protocol. This will tell you how to pick the best spots to monitor, and will also tell you how often you should go testing. Your safety while testing is of paramount importance; please review our safety tips before starting to test.
Designing your sampling program
Selecting your site
Choosing your site depends on your monitoring purpose. For E. coli, common sampling locations are:
- Where people are likely to swim or interact with water.
- Upstream and downstream of a suspected contamination source.
Comparing locations can help you investigate where contamination may be entering a waterbody. For example, you might sample above and below an outflow. Do not collect your sample directly from the outflow. Sample in the receiving waterbody instead. Read more at waterrangers.com/purpose
How often to test
Your sampling schedule should match your monitoring purpose. There is no single schedule that works for every site! Some groups sample weekly at about the same time so they can track changes over the season. Some sample before a recreational water activity. If weather or other events may affect your site, you may also choose to sample before and after those events. The important thing is to choose a schedule that helps answer your questions. Learn more about setting a schedule.
Sampling depth
When monitoring recreational water, think about where people are actually coming into contact with the water. Your sampling depth also depends on how deep the water is (i.e. Less than or more than 1 meter depth). For shoreline or shallow water sampling, collect your sample below the surface without disturbing the bottom sediment, aiming for at least 15cm below the surface.
Get to know your equipment
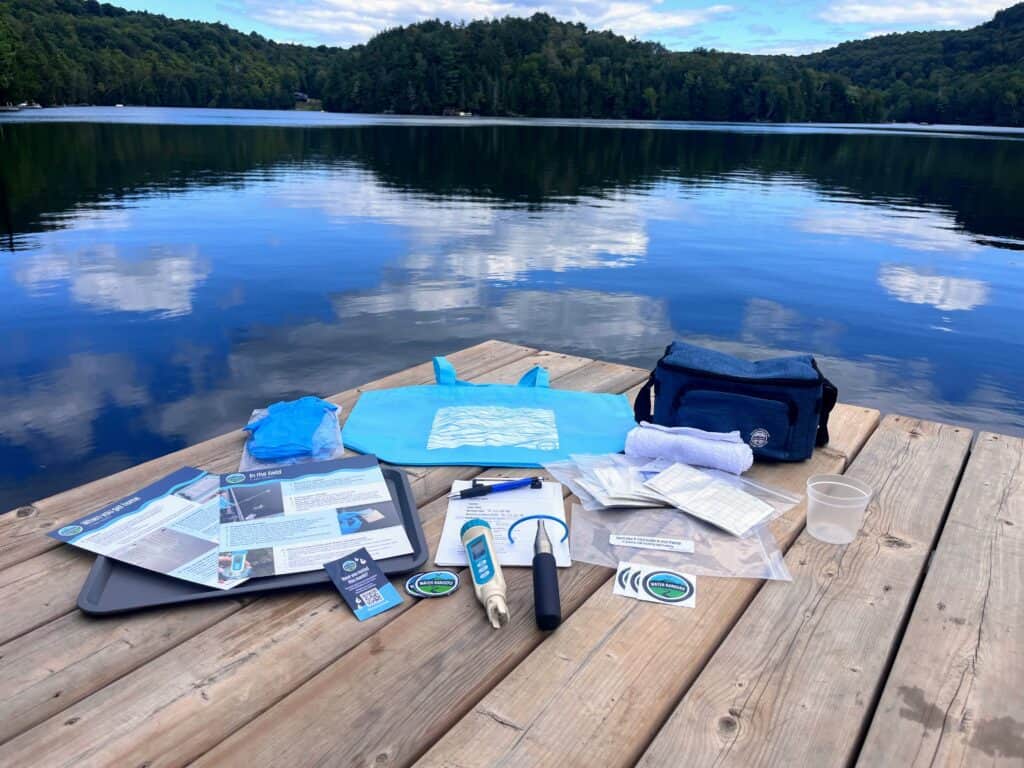
All of our E. coli testkits contain:
- 5x packs of R-Cards. Each pack includes 3 R-cards and a sterile syringe. Choose between 1mL or 3 mL varieties.
- Choose the 1mL R-Cards for higher concentrations of E.coli.
- Choose 3 mL R-cards for lower concentrations of E.coli.
- 10x pairs of protective nitrile gloves.
- 5 Whirl-Pak bags to collect a sterile sample.
- 2 sample cups with lids
- A ‘reacher’ stick with Whirl-Pak adapter to assist in collecting the sample.
- A ‘personal’ incubator to be used at home.
- A cooler bag to keep samples cool during transportation.
- Conductivity meter (tests for conductivity and water temperature): This measures the water’s ability to conduct electricity! You can read more about what this means and why it’s important here.
- A sampling tray to allow the cards to be laid out and kept level – important whilst the sample is being applied to the R-Cards.
- 5 field sheets to record qualitative observations and E. coli results.
- A small towel.
- A fiedl guide.
About R-Cards™
The R-Card method was developed by Dr. Jonathan Roth at Roth Biosciences, LLC. R-Cards contain a special growth medium that allows E. coli colonies to grow and become visible and countable.
1 mL and 3 mL card options : what’s right for you?
Water Rangers offers R-Cards for both 1 mL and 3 mL water samples. The main difference is the amount of water tested. Using 3 mL gives you a better chance of detecting E. coli when levels are very low. Using 1mL is useful when E. coli levels are higher, because the card is less likely to become too crowded to count.
We recommend the 1 mL card because it is easier to use and works well for most sites.
If you consistently get very low results, such as 0 to 2 colonies, the 3 mL card may be a better fit for your site. If you are using a 3 mL card and regularly get more than 5 colonies, your site may have higher E. coli levels. The 1 mL card may give you results that are easier to count. Neither card is more accurate than the other. The goal is to choose the sample volume that gives you results you can reliably count and compare over time.
Storing your R-cards
Store your R-Cards in an airtight bag in the freezer. The expiry date printed on the bag is based on freezer storage. According to the manufacturer, R-Cards can also be kept outside the fridge or freezer for up to four weeks at temperatures of 23°C or below if needed.
Triplicates and research
A triplicate means collecting and testing three samples at each site, then averaging the results. We recommend triplicates because research, including our own method validation, found that averaging three R-Cards gave more reliable results than using a single card.
Our research compared triplicate R-Card results with IDEXX Colilert, an approved method for testing recreational water. We found that triplicates agreed with IDEXX on whether water met or exceeded Canadian guidelines in 86% of samples (101 of 117). Single R-Cards agreed with IDEXX 83% of the time (295 of 357).
The E. coli testkit is being piloted through Water Rangers’ Lake Erie Rangers program, a three-year initiative (2024–2027) funded in part by the Canada Water Agency’s Freshwater Ecosystems Initiative. The program engages community scientists across the Lake Erie watershed in monitoring water quality and helping develop new tools for freshwater monitoring.
Read more below! E. coli testkit development and validation.
Learn how to use your kit
Before initiating testing, ensure that you have prepared your kit, identified your testing location, and established the timing for both testing and incubation.
Quick start guide
- Sanitation is critical for this test. Follow the sanitation checklist.
- Before you leave, prepare your testkit. If you are processing in the field, bring the R-cards with you in your cooler bag.
- Record your qualitative observations (weather, water colour etc.) and capture photos. Qualitative data is critical to provide context for your results.
- Collect your sterile sample. Wearing gloves, use your sterilized vessel (Whirl-Pak bag, sanitized sample cup) to collect the water sample.
- Record conductivity, water temperature and other test parameters.
- Transportation. Keep the water sample in your cooler bag with an ice pack until you get home <10 deg C. You must process your sample within 3 hours of collecting it!
- Process the R-cards. Dispense the water sample onto the card using the sterile syringe (1 mL or 3 mL). Let the plastic film fall gently and spread the water. Do NOT press on the card. Let it sit for 1-2 minutes to gel. Repeat for all three cards.
- Incubate the cards for 24 hours at 35 °C. 15 cards can be stacked in the incubator.
- Count colonies and convert results. Remove the cards, count the colonies (dots) on each card, multiply the counts by a conversion factor (1 mL cards x100 ; 3 mL cards x33) and report results in CFU/100mL.
- Tidy up!
Measuring E. coli with Water Rangers
All of these instructions can be found within the field guide that comes with your kit, too! We definitely recommend reading it from cover to cover.
Planning
Before you leave home
- Your testkit interior should be sanitized and dry from your previous testing.
- Put an ice pack in your insulated cooler bag to keep samples cool (aim for <10°C).
- Make sure you have enough supplies to complete all tests.
- You can turn on your incubator before you leave, or wait until you are back home. Warm your incubator to 35°C. This takes about 20 minutes.
Packing for the field
- An insulated cooler bag with bucket in it and frozen ice pack
- Whirl-Pak bags or sterile sample cup with lid
- Sample cup for other tests (water temp, conductivity, etc)
- Reacher stick with Whirl-Pak adapter
- Conductivity meter
- New gloves
- Pen
- Data entry sheet
- Towel
- This field guide!
Sanitation checklist
Producing useable, high quality data depends on you following the instructions!
- Keep your R-CARDs in the freezer when unused to prevent any contamination or growth.
- Sanitize your incubator and the inside of your testkit between uses.
- Sanitize your tray and work station.
- Wear clean gloves (avoid grabbing the fingertips of the gloves).
- If you’re not using a Whirl-pak bag, sanitize your collection vessel (cup, etc). Put both the cup and lid in boiling water for one minute. Do not use chemical disinfectant, as this can kill the E.coli. Place the cup and lid in a Ziploc bag to keep it sterile.
- Use sterile syringes to dispense water onto the R-cards (avoid touching the tip of the syringe) and use a new syringe for each site and sampling date (the same syringe can be used for all three replicates).
- Avoid touching the inside of the sterile sample collection vessel.
- Put an ice pack in your insulated cooler bag.
- Replace any item that becomes contaminated.
We strongly recommend collecting the water sample in the field and processing it at home. If you choose to process in the field, keep the R-Cards cool while you’re out (under 10°C but not on ice) and make sure you incubate within 3 hours.
You can turn on your incubator before you leave, or wait until you are back home. Warm your incubator to 35°C. This takes about 20 minutes.
Sampling
Step 1: Assess the site
- Conduct a risk assessment to make sure you’re safe to proceed!
- Record the date and time on your field sheet or app.
- Record other qualitative observations for weather and environment. Use your weather app on your phone to record air temperature. E. coli levels are impacted by weather events, especially rain and snow melts.
- Put on fresh gloves!
Step 2: Collect your sample
Option A: Whirl-Pak bag
- Label the Whirl-Pak bag with date, time and sample location.
- If using reacher stick, Attach Whirl-Pak bag to the reacher stick or bucket by slotting two tabs into the white attachment.
- Tear off the perforated top. Grip the paper pull tabs on both sides and pull them apart. Once the bag is open, do not touch the inside!
- In water >1 meter collect sample 15-30cm below the surface. For <1 meter, collect between bottom and surface.
- Hold the bag in the water and let it fill. Leave a few inches of space at the top of the Whirl-Pak so there’s room to seal it.
- To seal the Whirl-Pak bag, hold it by the flat wire ends at the top. Spin the bag forward three rotations to close it (hold away from your body). You should feel an air pocket.
- Bring the two wire ends together, twist them, and bend them against the bag.
- Turn the sealed Whirl-Pak bag upside down for a moment to check for leaks. We recommend you stand up the Whirl-Pak in the bucket in your cooler bag!
Option B: Sterilized sample cup
- Rinse your sample cup 3 times in the water you will be sampling.
- Collect sample 15cm below the surface. For shallow water, collect between bottom and surface without disturbing the sediment.
- Secure the lid and place the sample cup into the cooler.
Step 3: Take measurements for conductivity and temperature
Use your second sample cup to collect a new water sample. Do not use your E. coli sample cup to perform these tests. It must be sterile!
Water temperature
Sunlight and water temperature are two of the main factors in how long E. coli survives in lakes and rivers. Near the surface, sunlight is often the bigger factor, because UV light breaks E. coli down. Without sunlight, temperature matters more:
E. coli generally survive longer in cold water than in warm water, where predators and competing microbes are more active.
E. coli usually doesn’t multiply in open water, but it can survive and even grow in beach sand, sediment and algae mats such as Cladophora, especially when it’s warm. Recording water temperature helps you compare results over time and across seasons.
Conductivity
Conductivity measures how well water carries an electrical current: it depends on the amount of dissolved salts and minerals in the water, (e.g. chloride, sodium, calcium, magnesium, sulphate). Temperature also affects it, which is why we record water temperature alongside it. A sudden rise in conductivity can be a sign of pollution, such as road salt, sewage or runoff. But some lakes and rivers naturally have high conductivity because of the rocks and soils around them, so it’s best to compare readings over time at the same site. Lab testing is needed to confirm whether pollution is present.
Processing
Transporting your samples
Keep the samples cool (aim for 10°C ).
Aim to process samples within three hours of collection. If more time is needed, refrigerate (do not freeze) and process within 24 hours. Note the delay in your processing results.
Choosing to process R-Cards in the field
We strongly recommend processing samples at home or at the lab. However, some volunteers prefer processing in the field. If you have a nice flat surface, a clean work station, and you’re not fighting the wind or the weather, it works great. Make sure you clearly label each R-Card with the location, date and time of sampling and return all three cards to their own bag, then place them in the cooler bag, keeping cards <10°C.
Tips for in-field processing
- Pre-label your R-Card ziplock with the date and site information and make sure you have enough gloves and supplies for in-field collection.
- Keep the R-Cards cool before and after processing (under 10°C but not frozen) and make sure you incubate within 3 hours.
- When you are on site, label each of the R-Cards, especially if you’re doing multiple sites.
- Do your best to keep everything clean.
- Do not reuse syringes between sites.
- If wind picks up, or sampling becomes difficult, bring the sample home to finish processing.
- Warm your incubator to 35°C. This takes about 20 minutes.
- Sanitize your workspace with a disinfectant and set up a flat working surface.
- Put on fresh gloves.
- Take an R-card pack out of the freezer. Each pack has three R-cards per site.
- Label the card with site ID/Name, date, time and a number 1 through 3. (e.g. Lorraine Bay 1/3, Lorraine Bay 2/3, Lorraine Bay 3/3)
- Place the first R-card on a flat, level surface. You can use the clipboard provided. If the cards are not level, the water can drip or roll off.
- Gently shake your water sample. This is an important step if you are processing at home, as the E. coli may settle.
- Unwrap the syringe, handling only the plunger and barrel. Avoid touching the tip. Note for 1 mL cards, use a 1 mL syringe and 3 mL syringe for the 3 mL cards.
- Put the syringe’s tip into your water sample.
- Pull up the plunger until there’s 1 mL (or 3 mL) of water in the syringe.
- Tap the syringe to remove any bubbles, then adjust the plunger or add more water to reach the exact volume needed.
- Peel open the corner of the R-Card’s plastic cover.
- Slowly dispense the sample onto the center of the card.*
- * If you’re using 3 mL cards, we recommend you add 1 mL at a time, letting the plastic cover fall and the sample spread and then adding more until a full 3mL of water is dispensed.
- You do not need to cover the whole grid. Keep the sample flat to avoid spilling.
- Let the plastic cover gently fall down and spread out the sample.
- Wait 1–2 minutes for the liquid to gel.
- Repeat for all 3 cards. Use the same water sample and syringe for all three.
- Place the cards into the incubator.
Incubating
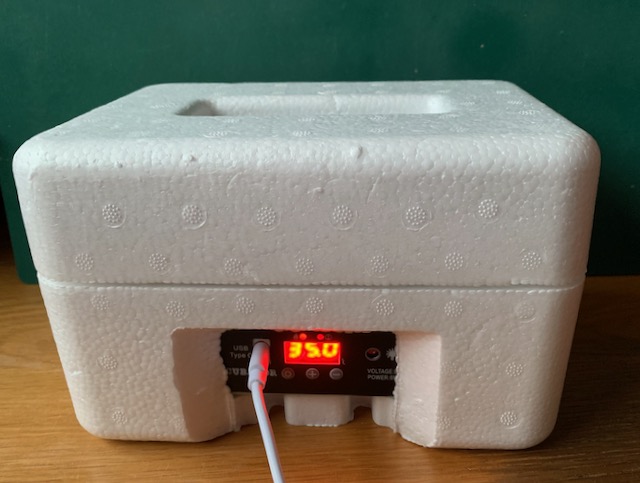
As part of the R-Card test kit, we offer a ‘home incubator’ which is a small USB-C powered unit originally designed for home incubation of small eggs. This allows a controlled and consistent incubation temperature.
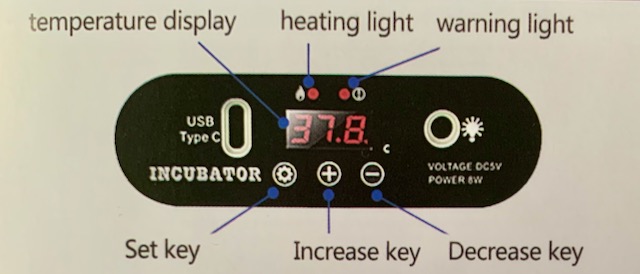
- Set the incubator temperature to 35 deg C (it defaults to 37.8 deg), and allow it to warm up to that temperature before putting in the R-Cards. It takes approximately 20 minutes for the incubator to warm up
- Confirm the incubator is maintaining 35°C using a secondary thermometer. Record the incubation start time on your data sheet.
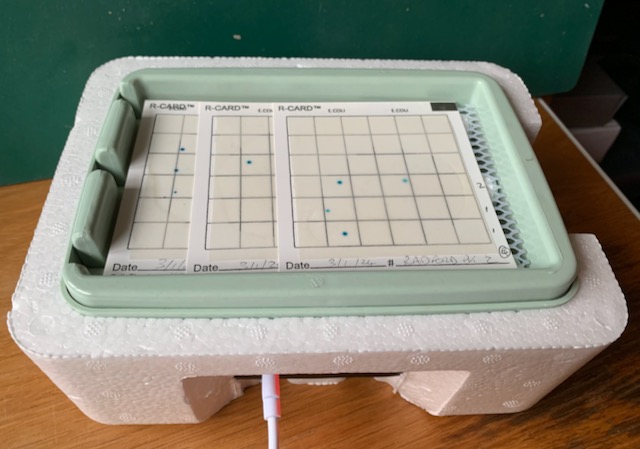
- Place all cards in the incubator, printed side up. Up to 15 cards can be stacked.
- Incubate for 24 hours.
Caring for your incubator:
- The incubator comes with some additional items such as rollers and water bottles for hydrating the eggs – these are not required for incubating the R-Cards and can be kept aside.
- The incubator is encased in styrofoam which helps retain heat and minimize energy costs, so keep that in place.
- Clean the incubator before each use with a weak bleach or antibacterial solution.
Analyzing
Tips for counting
Use the grid! Count the colonies per row and tally the total. The grid is just there to help you count.
Count all dots, regardless of size or if they are fainter than others.
When colonies obviously overlap, count both colonies.
If your colonies start overlapping, it can be considered TNTC (too numerous to count. Our rule of thumb is that if a card has more than 150 colonies, you can note this at the maximum (>15,000 for 1mL or >4,950 for 3mL).
We do not recommend dilution.
- After 24 hours but before 36 hours, remove the R-cards from the incubator.
- Turn off your incubator.
- Note the incubation end time on your field sheet.
- Count the blue dots on each card. Each dot is an E. coli colony.
- For each 1mL card, multiply results by 100. On 3mL cards, multiply results by 33.
- Record the calculated value for each card on the data platform. You can also average your results for your own records.
- Take photos of each card to verify later.
The standard for E. coli concentration is to report it as CFU per 100mL, where CFU is colony-forming units. Each dot is one colony. Because you only used 1mL or 3mL of water per card, we must multiply the # of colonies by 100 or 33 to get to the 100mL concentration. Record the converted results on your datasheet.
We then take an average of the three cards to get a more accurate estimate of the E. coli concentration. Note: If you upload your results to the Water Rangers data platform, it will average the results for you.
Examples
Example with 1mL cards
Card 1: 10 CFU/ 1mL x 100 = 1,000 CFU/100mL
Card 2: 7 CFU/ 1mL x 100 = 700 CFU/100mL
Card 3: 9 CFU/ 1mL x 100 = 900 CFU/100mL
The average calculated and displayed by the data platform would be 867 CFU/100mL.
Example with 3mL cards
Card 1: 155 CFU/ 3mL x 33 = 5,115 CFU/100mL
Card 2: 56 CFU/ 3mL x33 = 1,848 CFU/100mL
Card 3: 97 CFU/ 3mL x33 = 3,201 CFU/100mL
verage calculated and displayed by the data platform would be 3,388 CFU/100mL.
Clean-up
- Used R-Cards should be placed back into the resealable bag, then disposed of in your regular garbage. We like to give a quick spray of cleaning solution in each bag. Put unused R-Cards back in the freezer.
- Your water samples can be poured down your sink drain.
- Cut the top off the Whirl-Pak bag. The bottom portion can be recycled, while the top is garbage. Used syringes and gloves may be recyclable. Check local rules!
- Wipe down all surfaces, your testing equipment, bag, and incubator. Put your ice pack back in the freezer and wash your hands thoroughly.
- Store all items in a dry temperature-controlled space.
Interpreting your results
A single E. coli sample is a snapshot, and levels can change day to day, so regular testing is recommended. Most regions follow similar thresholds to judge whether there’s a risk of illness during swimming and recreation.
NOTE: R-Cards are a screening tool, not an official test. Only public health units can confirm whether water is safe for swimming or issue advisories.
If your results exceed your local guidelines:
- Stay out of the water.
- Test again on another day to see if the result holds.
- Share your results with your local public health unit. If you think you’ve found a source of pollution, you can also contact your municipality or conservation authority.
Please don’t post warnings or name possible sources publicly. Results can change quickly, and health units are best placed to confirm a problem and tell the public.
Canada
In Canada, the federal government guidelines, Guidelines for Canadian Recreational Water Quality (2024), for E.coli are the following:
Canada, Guidelines for Canadian Recreational Water Quality 2024, E.coli Guidelines for Primary-Contact Recreation∗
- 235 CFU/100 mL or less, single sample: meets the Beach Action Value (BAV) guideline. BAVs inform day-to-day beach management decisions. If E. coli concentrations exceed the established BAVs, this should trigger actions.
- Over 235 CFU/100 mL, single sample: exceeds the guideline and may pose a risk to swimmers. Avoid swimming, test again, and share your results with your local public health unit.
- Geometric mean consistently over 126 CFU/100 mL: This guideline is for judging the site overall suitability for recreation, not a single day. If the site is consistently exceeding this threshold, it may represent a greater level of risk to human health and may not be suitable for primary contact recreation.
United States, EPA Recreational Water Quality Criteria 2012
- 235 CFU/100 mL or less, single sample: below the Beach Action Value.
- Over 235 CFU/100 mL, single sample: exceeds the Beach Action Value and may pose a risk to swimmers. This is the level at which beach managers often post advisories.
- Geometric mean of 126 CFU/100 mL or less: meets the long term criteria.
England
The thresholds for E. coli in English bathing waters:
- Excellent: E. coli threshold is ≤500 Colony Forming Units per 100mL (CFU/100 mL)
- Good: E. coli threshold is ≤1000 CFU/100 mL
- Sufficient: E. coli threshold is ≤900 CFU/100 mL
- Poor: E. coli values are worse than the sufficient threshold
Scotland
In Scotland the values are:
- Excellent: E. coli threshold is ≤250 CFU/100 mL
- Good: E. coli threshold is ≤500 CFU/100 mL
Replenishing your kit
-
E. coli Testkit
USD$220.00 -
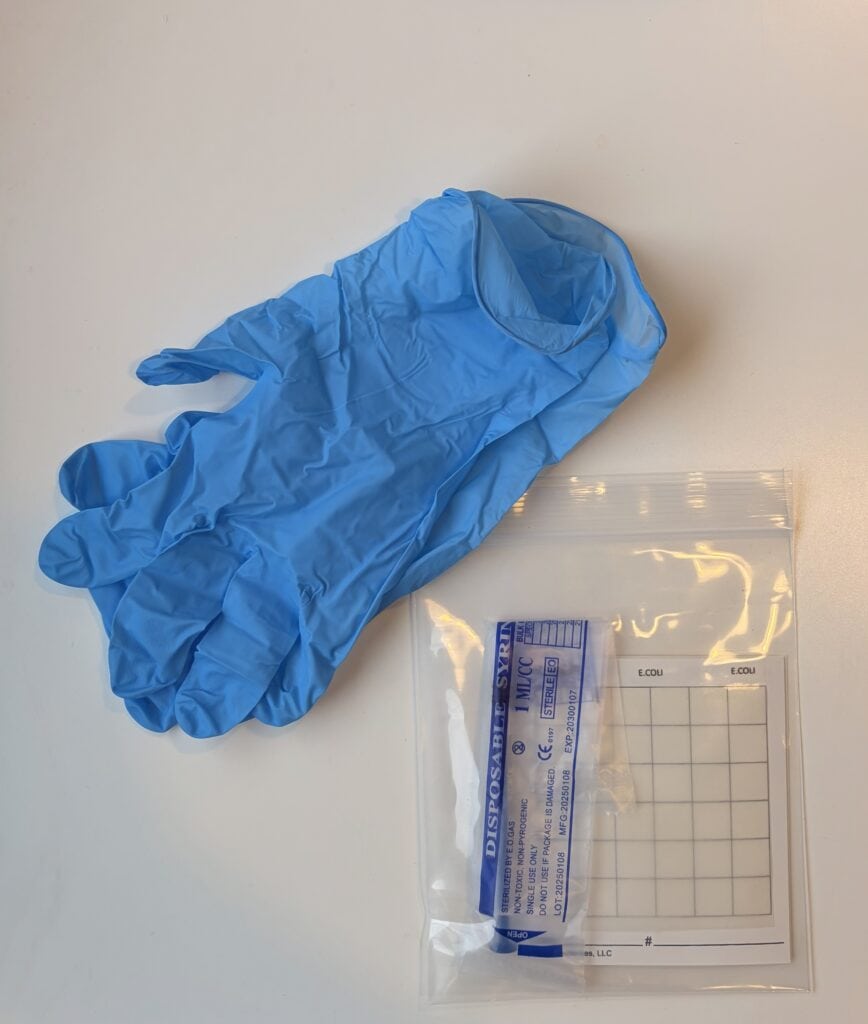
E. Coli Testkit replenishment packs
USD$19.00 -
E. coli Testkit (UK)
USD$194.25 -
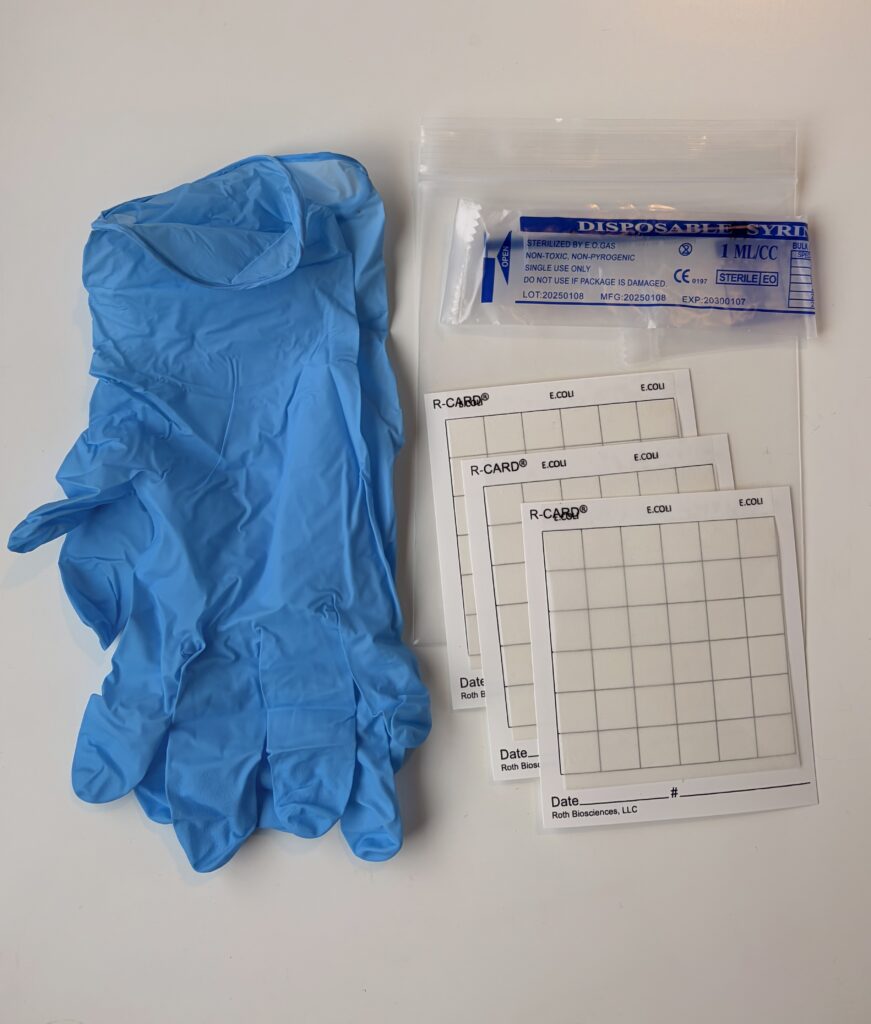
E. Coli Testkit replenishment packs (UK)
USD$16.50
Feedback? We want to hear from you.
We’d love to hear about your experience and get feedback on your experience with the E. coli testkit. Your responses will help us improve the kit and our training process. All responses are confidential and will be used solely for program improvement.